* or Similar tools with the option to define custom Webhooks.
While Zapier has a native connector to SFDC, the native connector is very limited in the scope of what it can do in SFDC. It's great for searching objects, but it's much less advance in executing commands on Objects. For that, the only way to use Zapier is to opt to send some of the commands via the API, directly from Zapier, and not via the native connector.
In order to send API commands directly to SFDC from Zapier, you would need at least Two Webhooks steps - one for authentication, and the 2nd one to execute the command you wish to execute.
From my personal experience, it is always the authentication part that takes most time to figure up, especially for non-developers, due to lack of understanding of how HTTP Request Methods work and the different UI between common dev-tools (CURL), development languages and Zapier.
But worry not - I'm here!
In this series I'll show you how to authenticate your requests via Zapier to common Marketing and Sales tools. In this post we'll start with Salesforce.
Salesforce (SFDC)
To connect the REST API we would need to do the following:
- In SFDC - Create a connected App via salesforce Setup [one-time setup]
1. Go to Setup -> Apps -> App Manager
2. Create a 'New Connected App'.
Fill Connected App Name, API Name and Contact Email.
Check 'Enable OAuth Settings'
In the Callback URL, write - https://login.salesforce.com/
Under Selected OAuth Scopes - enable (add) the following:
Access and manage your data (api)
Perform requests on your behalf at any time (refresh_token, offline_access)
Provide access to your data via the Web (web)
Save. - Get the Key and Secret strings from it's management page.
View the app, and copy both Consumer Key and Consumer Secret. - Now for Zapier!
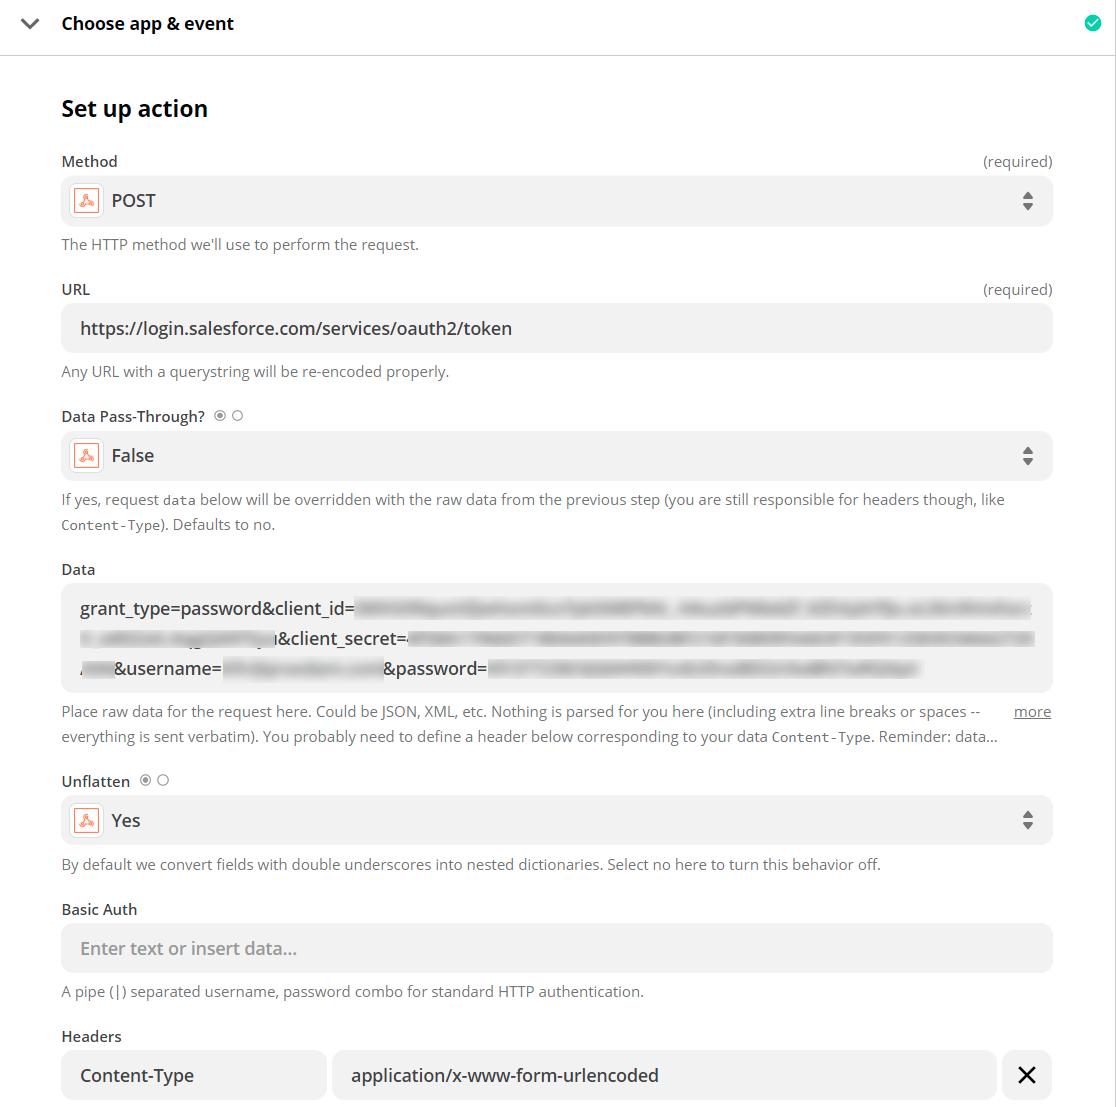
Use the Key and Secret, alongside a Username and Password to get a Bearer Token from SFDC.
This requires to send a Zapier Webhook, with the following settings:
Method: POST
URL: https://login.salesforce.com/services/oauth2/token
Data Pass-Through: Default (false)
Data:
grant_type=password&client_id=consumerkey&client_secret=consumersecret&username=sfdcuser&password=sfdcpassandtoken
Under headers - add:
Content-Type : application/x-www-form-urlencoded
(Replace the values with values from your created app and your sfdc user, Note: the password for the user should include the password + the token emailed to you after a password reset - one after the other)
The result of this request, will include the access_token which is required for each API command you wish to pass SFDC.
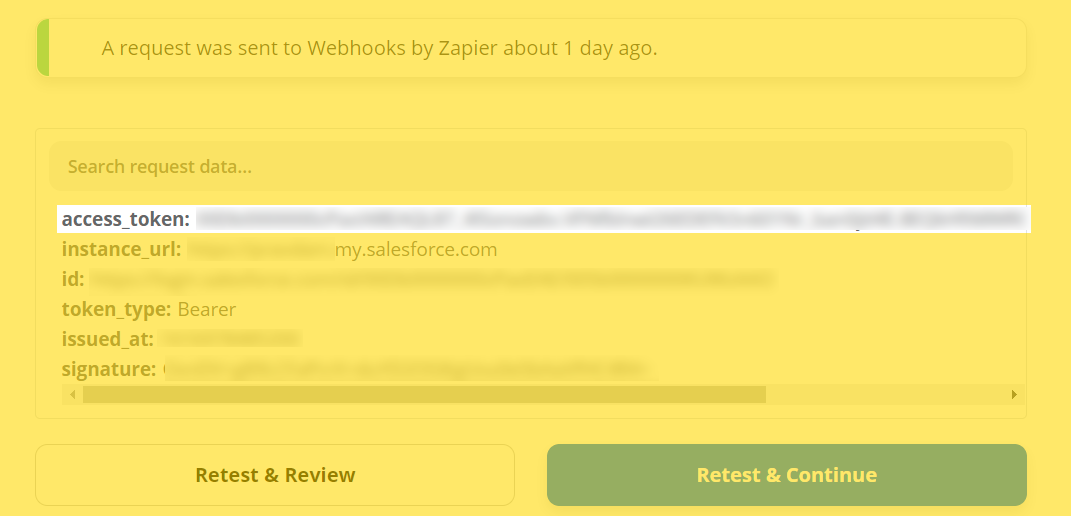
- Using this token, we can send commands to SFDC via it's API, such as - Creating or Deleting an Object. Use the value of access_token in your next Zapier step.
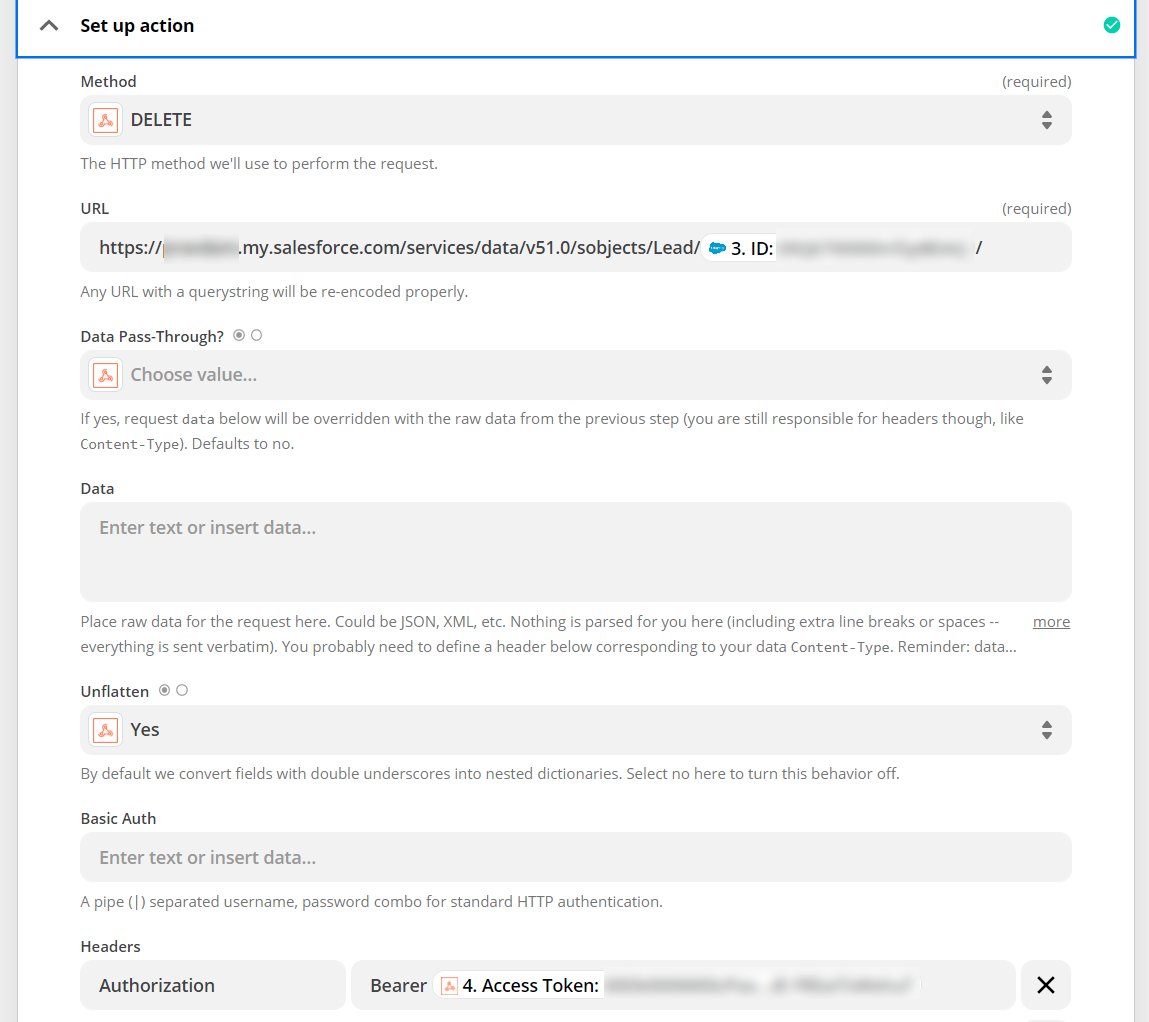
- Let's say we wish to delete a lead - we can create a webhook that uses the Delete method.
We will use a URL that contains your SFDC organization address, the specific Object endpoint (Lead) and the ID of the lead (you can find it via the regular Zapier-SFDC connector, if you don't want to write the query yourself):
https://xyz.mysalesforce.com/services/data/v51.0/sobjects/Lead/ID/
(replace the bolded parts with your own data)
We will pass the authentication token we have received earlier via the Headers.
Use Authorization with the value:
Bearer XYZ
(Replace the bolded part with the access_token value from the previous Zapier step)
That's It! You authenticated to SFDC via Zapier Webhooks and now you can do MUCH MORE than if you have only used the native connector. Use it wisely.